As a passionate gardener, I know the joy of growing your own organic seeds. There’s something incredibly satisfying about nurturing a tiny seed into a thriving plant. In this article, I’ll share with you the 6 best techniques I’ve discovered for homegrown organic seeds. From preparing the soil to selecting the perfect seeds, and from germination to natural pest control, I’ll guide you through each step. Get ready to unlock the secrets to a bountiful and sustainable garden.
Soil Preparation
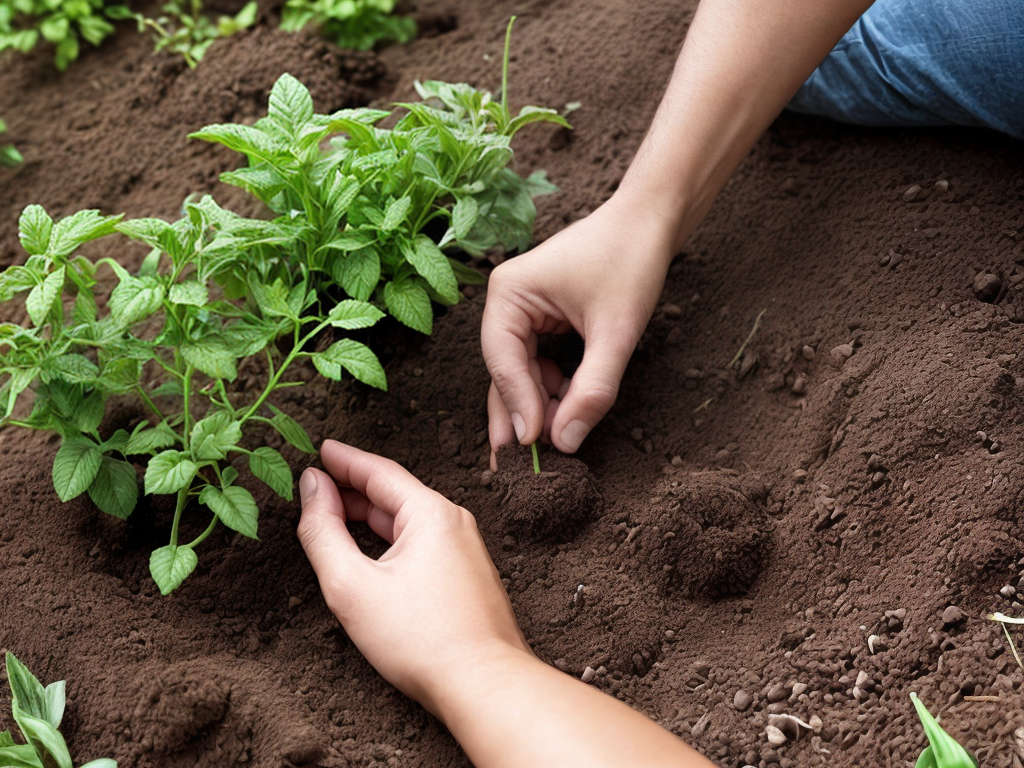
To ensure optimal growth and health of my homegrown organic seeds, I carefully prepare the soil using organic amendments and a nutrient-rich compost. Composting is one of the most effective methods to create high-quality organic fertilizers. I start by collecting kitchen scraps, yard waste, and other organic materials. These materials are then layered in a compost bin or pile and regularly turned to promote decomposition. It is important to maintain a balance of carbon-rich (brown) and nitrogen-rich (green) materials to ensure a healthy composting process. Adding water and turning the compost regularly helps to speed up decomposition. After several months, the compost transforms into a dark, crumbly material that is rich in nutrients. This compost can then be added to the soil, providing essential nutrients for my organic seeds to thrive.
Seed Selection
For my homegrown organic seeds, I carefully select high-quality varieties suited to my growing conditions. It is important to choose seeds that are genetically diverse to ensure the resilience and adaptability of my plants. By selecting a variety of seeds, I can increase the chances of success and reduce the risk of diseases or pests affecting my crops. Additionally, I also consider seed saving techniques when choosing my seeds. Saving seeds from my own plants allows me to preserve heirloom varieties and maintain a self-sustaining seed bank. It is a rewarding practice that promotes self-sufficiency and ensures that I always have a fresh supply of high-quality seeds for future planting seasons.
To help you understand the importance of seed selection, here is a table showcasing some factors to consider when choosing seeds:
| Factors to Consider | Description |
|---|---|
| Genetic Diversity | Select a variety of seeds to ensure adaptability and resilience in your plants. |
| Adaptability | Choose seeds that are suited to your specific growing conditions, such as climate and soil type. |
| Disease Resistance | Look for seeds that have natural resistance to common diseases in your area. |
| Yield Potential | Consider the expected yield of the plant variety to meet your gardening goals. |
Germination Techniques
When it comes to germinating organic seeds, two key factors to consider are soil moisture and temperature requirements. Achieving optimal soil moisture is crucial for successful germination, as seeds need enough moisture to absorb and activate their growth processes. Additionally, providing the right temperature conditions is essential, as different seeds have different temperature preferences for germination. By understanding and meeting these requirements, home gardeners can increase their chances of successful seed germination and start their organic garden off on the right foot.
Optimal Soil Moisture
In my experience, achieving optimal soil moisture is crucial for successful germination when growing homegrown organic seeds. Here are some techniques I’ve found helpful:
-
Watering frequency: It’s important to water the seeds regularly, but not excessively. Overwatering can lead to rot and fungal diseases, while underwatering can hinder germination. Finding the right balance is key.
-
Soil drainage: Good soil drainage is essential to prevent waterlogging and ensure that the soil doesn’t become too saturated. This can be achieved by using well-draining soil mixes or adding organic matter to improve soil structure.
-
Mulching: Applying a layer of organic mulch around the seeds helps to retain soil moisture and regulate temperature. This can be especially beneficial in dry climates or during hot weather.
-
Monitoring moisture levels: Regularly checking the soil moisture levels using a moisture meter or by feeling the soil with your finger can help you determine if the seeds need watering or if the soil is adequately moist.
Temperature Requirements
To ensure successful germination of homegrown organic seeds, it is important to consider the temperature requirements and implement suitable germination techniques. Temperature plays a crucial role in seed germination as it affects the enzymes and metabolic processes required for growth. Proper seed storage is essential to maintain the viability of seeds. Storing seeds in a cool, dry place helps to preserve their quality and ensures higher germination rates. When it comes to seasonal planting, it is crucial to understand the temperature preferences of different plant species. Some seeds require warm temperatures to germinate, while others thrive in cooler conditions. By researching the temperature requirements of specific seeds and adjusting planting times accordingly, you can optimize germination rates and improve overall plant health.
Natural Pest Control
When it comes to protecting my homegrown organic seeds from pests, I have found that companion planting is a great technique. By planting certain plants together, I can naturally repel pests and improve the overall health of my garden. Additionally, I have experimented with homemade insect repellents made from ingredients like garlic, neem oil, and soap, which have proven to be effective in keeping pests at bay. Lastly, I have also encouraged the presence of beneficial insects, such as ladybugs and lacewings, to help control pest populations naturally.
Companion Planting Benefits
I’ve found that companion planting provides excellent natural pest control for my homegrown organic seeds. By strategically planting certain plants together, I can create a beneficial environment that helps deter pests and attract beneficial insects. Here are some key benefits of companion planting:
-
Crop rotation benefits: Companion planting helps break the cycle of pests and diseases by rotating crops within the garden. This reduces the likelihood of pests building up and improves overall plant health.
-
Planting for pollinators: Certain plants, such as marigolds and lavender, attract beneficial insects like bees and butterflies. These pollinators help fertilize flowers and increase fruit production.
-
Natural pest repellents: Some plants, like garlic and onions, emit strong odors that repel pests. By interplanting these with susceptible crops, I can naturally deter pests without the need for chemical pesticides.
-
Habitat creation: Companion planting with diverse plant species creates a habitat that attracts a range of beneficial insects, including predators that prey on common garden pests.
Homemade Insect Repellents
One effective method for natural pest control in my homegrown organic seeds is using homemade insect repellents. These DIY repellents are made from natural ingredients and provide chemical-free alternatives to keep pests at bay. By making my own insect repellents, I have the peace of mind knowing that I am not exposing my plants to harmful chemicals. One popular natural ingredient for homemade insect repellents is neem oil. Neem oil is derived from the seeds of the neem tree and has been used for centuries as a natural pesticide. It is effective against a wide range of pests, including aphids, caterpillars, and beetles. Another natural ingredient that can be used is garlic. Garlic has strong insect-repelling properties and can be easily made into a spray by blending garlic cloves with water. These homemade insect repellents are not only effective but also cost-effective, making them a great choice for organic gardening.
Beneficial Insects for Protection
Using beneficial insects is an effective method for protecting my homegrown organic seeds from pests naturally. Integrated pest management is a holistic approach that focuses on prevention, using natural predators to control pests. Here are some beneficial insects that I attract to my garden:
- Ladybugs: These colorful beetles feed on aphids, mites, and other soft-bodied insects, keeping them in check.
- Lacewings: With their delicate, lacy wings, lacewings are voracious predators of aphids, caterpillar eggs, and mealybugs.
- Hoverflies: Resembling bees, hoverflies are important pollinators, but their larvae also eat aphids and other pests.
- Parasitic wasps: These tiny wasps lay their eggs inside pest insects, such as caterpillars or aphids, effectively controlling their population.
To attract these beneficial insects, I plant nectar-rich flowers like marigolds, daisies, and yarrow. This not only provides them with food but also helps to attract pollinators, ensuring the health and productivity of my garden.
Proper Watering Techniques
To ensure optimal growth and development, it is essential to water your homegrown organic seeds with the proper technique. Watering frequency is crucial to keep the soil consistently moist but not overly saturated. It is recommended to water your seeds every 2-3 days, depending on the weather conditions and soil moisture levels. Mulching is another beneficial practice that can help retain moisture in the soil. By applying a layer of organic mulch around your seedlings, you can reduce evaporation and conserve water. Mulching also helps to suppress weed growth and regulate soil temperature. When watering, it is important to water at the base of the plants to prevent wetting the leaves, which can lead to fungal diseases. By following these watering techniques, you can provide your homegrown organic seeds with the right amount of water they need for healthy growth.
Harvesting and Seed Saving
I carefully collect the mature seeds from my homegrown organic plants for future use. Harvesting and saving seeds allows me to continue growing my favorite varieties year after year. Here are some important steps to follow for successful seed saving:
- Choose the healthiest plants: Select plants that are disease-free and have produced the best fruits or vegetables.
- Allow seeds to fully mature: Leave the fruits or vegetables on the plant until they are fully ripe and the seeds have developed.
- Properly clean and dry the seeds: Remove any remaining pulp or debris from the seeds and lay them out to dry in a cool, well-ventilated area.
- Store seeds correctly: Place the dried seeds in airtight containers, such as glass jars or envelopes, and store them in a cool, dark, and dry place to maintain their viability.


